Photography is an art, which enables people to record time, narrate and be creative. As a beginner, it is necessary to grasp the basics and be able to enhance your skills and come up with a gorgeous photo. The guide will discuss what photography techniques entail such as camera settings, composition, lighting among others.
Understanding Your Camera
Types of Cameras
It is important to play with the various types of cameras on the market before venturing into photography techniques:
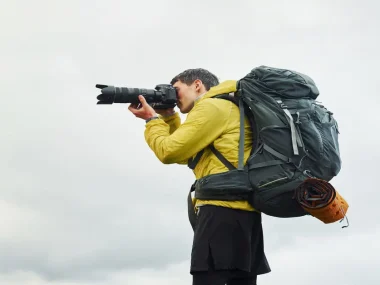
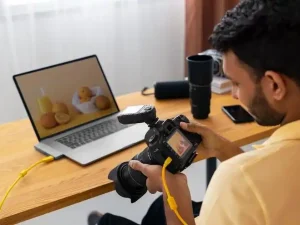
- DSLR Cameras: Digital Single-Lens Reflex cameras are versatile and versatile in quality of images. For a deeper analysis, consult the ultimate guide camera gear.
- Mirrorless Cameras: These are the same cameras as DSLRs but they are lighter and smaller in size. They can also swap lenses interchangeably and give high quality images and usually have high-level autofocus.
- Point-and-Shoot Cameras: These are small cameras and are easy to use and perfect to a beginner user. They have automatic settings and are ideal in casual photography.
- Smartphone Cameras: The smartphones today are also high-end cameras capable of producing good quality images. They are portable and suitable when taking pictures on the go.
Introducing Yourself to Camera Adjustments
You need to know your camera settings so as to take great pictures. The following are the main settings that you need to be aware of:
- Aperture (f-stop): The aperture will regulate the quantity of light coming to the camera. The f-stop can be lower (e.g., f/2.8), which admits more light and gives the effect of a shallow depth of field (blurry background), or can be higher (e.g., f/16), which admits less light and gives the effect of greater depth of field (more in focus).
- Shutter Speed: This is the duration that the sensor of the camera is open to light. A high shutter rate (e.g. 1/1000s) is used to freeze motion and a slow shutter rate (e.g. 1/30s) can produce motion blur, which can be beneficial to record any movement creatively.
- ISO: The ISO environment stipulates the sensitivity of the camera to light. Whether it is a sunny day or just dark, low ISO (e.g., 100) is preferable and high ISO (e.g., 1600 or 3200) is better but may add noise to the image.
Real-Life Example
Take the case of Emily, who is a novice photographer who begins with a DSLR camera. Through trial and error, she understands the ability of the aperture to form beautiful portraits by blurring the backdrop, and the shutter speed by capturing fast-moving scenes, such as her dog in the park running.
Composition Techniques
Composition refers to how elements are arranged in a photograph and they have the potential to greatly influence the quality of your photographs. The following are the key composition techniques to be taken into consideration:
The Rule of Thirds
The Rule of Thirds is one of the principles of photography. Suppose you have a 3×3 grid of your frame. Put areas of interest across these lines or at their crossroads. The method produces the effect of balance and attracts the attention of a viewer to the object.
Leading Lines
Natural lines in a scene are called leading lines that guide the eye of a viewer to a subject of interest. This may be a highway, a street or a stream. The application of leading lines creates depth and directs the viewer through the picture.
Framing
Framing entails making use of the things around you to frame your subject. This may be doors, windows or branches. Framing makes attention to the subject and context to the image.
Symmetry and Patterns
Patterns and symmetry have the ability to produce images that are visually striking. Find repeated motifs or symmetry e.g. trees in rows or architectural designs to give your photographs harmony and balance.
Real-Life Example
John is an amateur landscape photographer, and he uses the Rule of Thirds by aligning the horizon line to the upper third of the picture. He also uses leading lines through taking a winding road that leads to the mountains and this adds a type of depth to his landscape photographs.
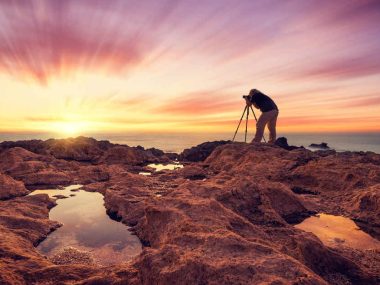
Mastering Lighting
Light is one of the most significant elements of photography. The knowledge of how to employ both natural and unnatural lighting will be helpful to improve your photographs.
Natural Light
The mood and quality of photographs can be affected by the natural light that changes during the day. The following are some of the tips of working with natural light:
- Golden Hour: The golden hour is considered to be the hour after sunset and the hour before sunrise because it offers soft and warm light that boosts colors and minimises harsh sun rays.
- Cloudy Days: During cloudy days, the light is diffused and this aspect is favorable to portrait photography since it eliminates deep shadows and offers equal lighting.
- Direction of Light: Be aware of direction of light. The side lighting can be applied to add texture and depth, whereas the backlighting can be used to create dramatic silhouettes.
Artificial Light
Artificial lighting sources can be used to control lighting in your photos. The following are popular sources of artificial light:
- Flash: Flash may be added to your subjects with a speedlight or external flash. Test various positions and settings to gain the required effect.
- Nonstop Lighting: Studio lights or LED panels are used to have a constant lighting so that you can check the effects of the light on your subject and then capture an image.
Real-Life Example
Sara is a portrait photographer who enjoys working during the golden hour. She learns that the warm light does well and pleases the skin tones of her subjects. During the rainy seasons she has a huge diffuser that she uses to subdue the sunlight which is harsh when she is shooting outside.
Getting to know Depth of Field
Depth of field is the field of distance that your image appears to be in focus. It depends on aperture, distance to a subject and focal length. The depth of field can be controlled in the following way:
Shallow Depth of Field
The background is softened by the shallow depth of field ((low f-stop) such as f/2.8) which focuses the subject and a desirable bokeh has been achieved. This comes in handy especially on portrait photography where you are keen on putting the attention on the subject.
Deep Depth of Field
A high f-stop (such as f/16) gives the appearance of the deep depth of field, which is best in landscape photography, where you would wish to have the foreground details and the background details reflected in the camera.
Real-Life Example
Mike is an enthusiastic nature photographer who takes most of his pictures with a wide aperture to produce shallow depth of field images of flowers and make them stick out against a blurred background. On the other hand, he changes to a higher f-stop when taking photographs of large landscapes so that all the foregrounds up to the mountains in the background are in focus in the photograph.
Conclusion
Photography is an art form which is very rewarding and fulfilling because you are able to record what is around you. With the knowledge of the fundamentals of camera settings, composition and lighting, as well as post-processing, you will be able to improve your photography abilities and produce amazing photos. Always keep in mind that practice is the most important one, you should be ready to experiment, to learn your mistakes, and to enjoy your photography adventure mostly!
FAQs
1. Can I have good photos with an expensive camera?
Answer: No, but the most important feature of cinema is that a lot of good photographs are made using lower-end cameras (or even smartphones). Concentrate on how to do the fundamentals and be a better person.
2. What can I do to make myself better?
Response: Have to get used to composition skills such as the Rule of Thirds, leading lines and framing. Examine the photos you like most because this way you will observe how they are arranged and you will be able to reproduce those styles in your work.
3. How can one learn photography?
Answer: The most appropriate way of learning photography is by practice. Always bring your camera and learn with the various settings and techniques used and get the comment of fellow photographers or through the internet communities.